A food festival is one of the few events where the product sells itself. Nobody needs convincing that they want to eat tacos in a park on a Saturday. What people need is a reason to buy a ticket in March for something happening in September — and that is an entirely different problem.
This guide covers the whole build, from the first sketch on a napkin to the post-event debrief. It's written for the organizer doing this for the first or second time: a chamber of commerce, a brewery owner, a nonprofit, a group of restaurant people who think their town deserves better. Where possible we've included actual numbers and templates instead of "make sure to budget carefully."
Before you start: the honest gut check
Food festivals fail in a specific way. They don't usually fail from low attendance — they fail from good attendance and bad math. Five thousand people walk through the gate, everyone has a great time, and the organizer loses eleven thousand dollars on restrooms, generators, and a security company that billed for more hours than expected.
So before anything else, answer three questions:
What is this event actually for? Community building, tourism, fundraising, promoting local producers, or profit. These lead to genuinely different events. A fundraiser can accept a thin margin and lean on volunteers. A commercial festival cannot. Write your answer down somewhere you'll see it, because every hard decision later gets easier when you know which one you're optimizing for.
Who is coming? "Everyone" is not an audience. Families need shade, seating, restrooms within sight of a stroller, and food under $15. Serious food people need vendors worth traveling for and will pay $60 for a tasting pass. You can serve either well. Trying to serve both usually produces an event that's slightly disappointing to both.
What does success look like in a number? 3,000 attendees. $40,000 raised. Twenty vendors who say yes again next year. Pick one primary metric before you start, or you'll grade yourself on whatever happened to go well.
Pick your format early
"Food festival" covers a dozen distinct events with different cost structures:
Food truck rally — mobile vendors, low infrastructure, heavy power and water demands
Street food market — pop-up stalls, high footfall, often free entry with revenue from vendor fees
Food and wine festival — tastings, higher ticket price, alcohol licensing, glassware, ID checks
Beer and food event — brewery-led, strong sponsor potential, heavy pour logistics
Cultural or regional cuisine festival — community-anchored, strong press angle
Farm-to-table or harvest festival — rural venue, agritourism crossover, seasonal timing
Night market — evening trading, lighting costs, excellent social media performance
Seasonal market — holiday timing, retail crossover, weather-dependent
The format determines your permit list, your insurance, your staffing, and your ticket price. Choose it before you talk to a single vendor.
Step 1: Write the proposal
Almost nothing happens until someone else says yes — a parks department, a landowner, a city council, a sponsor. A short written proposal is how you get those yeses, and writing it will expose the parts of your plan that are still vapor.
Keep it to four or five pages:
Concept, format, and audience
Date, venue, and expected attendance
Budget summary and revenue model
Vendor and entertainment approach
Marketing plan
Safety, insurance, and risk management
What you're asking for, specifically
Different readers care about different pages. City and parks departments want safety planning, traffic and noise mitigation, waste management, and community benefit. Sponsors want audience demographics and what they get for their money — put a simple tiered sponsorship menu in an appendix. Landowners want insurance certificates, site restoration, and a named person responsible. Lenders or investors want the budget and the break-even.
Write the version for your hardest audience first. The rest are edits.
Step 2: Build a budget that assumes something goes wrong
This is the section most guides skip past with a bullet list. Here's how to actually do it.
The cost lines you'll have
Fixed costs (you pay these whether 200 or 2,000 people show up):
Venue or park rental, plus damage deposit
Permits and licenses
Insurance — general liability, liquor liability, event cancellation
Portable restrooms and handwash stations
Power: generators, distribution, fuel, and an electrician
Water access and greywater disposal
Fencing, barricades, staging, tenting, tables, seating
Waste collection, dumpsters, and site cleanup
Signage and printing
Entertainment fees
Marketing and advertising
Contingency
Variable costs (these scale with attendance):
Security and medical staffing
Additional restroom servicing
Ice
Cups, glassware, wristbands, sample tickets
Payment processing and ticketing fees
A worked break-even example
The numbers below are illustrative — your real quotes will differ by market — but the structure is what matters. Run this exact arithmetic with your own quotes.
Say you're planning a one-day festival targeting 2,000 attendees.
Line | Amount |
|---|---|
Venue and permits | $4,000 |
Insurance | $2,200 |
Restrooms and handwash | $2,800 |
Power, generators, fuel, electrician | $5,500 |
Fencing, tenting, tables, seating | $6,000 |
Security and medical | $4,500 |
Waste and cleanup | $2,000 |
Entertainment | $5,000 |
Marketing | $4,000 |
Signage, supplies, ice, misc. | $2,000 |
Subtotal | $38,000 |
Contingency at 15% | $5,700 |
Total cost | $43,700 |
Now the revenue side. At a $25 general admission ticket with 25 vendors paying $400 pitch fees:
2,000 tickets × $25 = $50,000
Vendor fees: 25 × $400 = $10,000
Sponsorship: $8,000
Total: $68,000
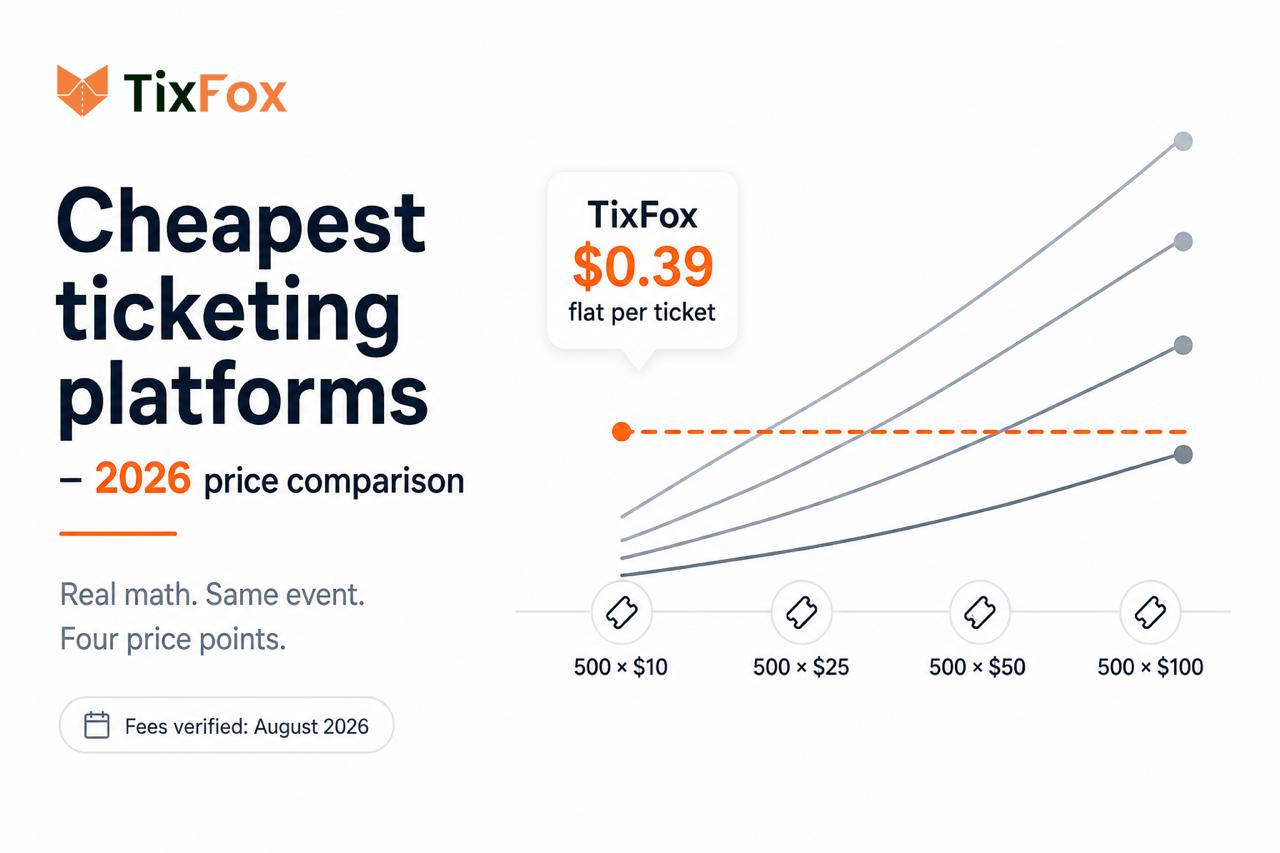
Ticketing costs on 2,000 tickets at TixFox's 39¢ per ticket come to $780, plus Stripe's card processing at 2.9% + 30¢. Budget roughly $2,400 all-in for payment handling on that volume.
That leaves about $21,900 of margin — which sounds comfortable until you notice that if attendance lands at 1,200 instead of 2,000, ticket revenue drops to $30,000 and you're barely above break-even. Your break-even here is around 1,030 tickets. Know that number. Write it on the wall.
Two rules that will save you
Build 15% contingency, and don't spend it in April. Weather, a vendor cancelling, a generator failing, a permit requiring something you didn't expect — one of these will happen.
Get to break-even on non-ticket revenue if you can. Vendor fees and sponsorship arrive early and don't depend on the weather forecast. Ticket sales for outdoor events are heavily back-loaded, and a bad forecast on the Thursday before can wipe out a third of your walk-up. The festivals that survive a rained-out year are the ones where sponsors and vendors already covered the fixed costs.
Step 3: Choose the date and venue
The date
Check, in this order: competing local events, school calendars, major sporting events, holiday weekends, and what the weather actually did in your area on that date for the last five years.
Then check supplier availability. This is the one people miss. If a large event is happening the same weekend within an hour's drive, portable restrooms, generators, fencing, and security staff all get scarce and expensive simultaneously. Moving your event one week can cut four figures off your infrastructure bill.
For a first-year event, give yourself six to twelve months. If you need a specific park or a popular date, book the venue a year out.
The venue
Start with the unglamorous checklist:
Capacity, and what the permitted capacity is versus the physical one
Vehicle access for vendor load-in, and whether trucks can get on grass
Power availability and amperage, or space for generators
Potable water and greywater disposal
Parking, transit access, rideshare drop zone
ADA access — paths, restrooms, seating, parking
Cell signal (critical: vendors need it for card payments)
Shade and wet-weather options
Noise restrictions and curfew
Whether alcohol can be served there at all
That last one has ended more festival plans than anything else. Confirm alcohol permissions before you fall in love with a site.
Site layout
Layout is a revenue tool, not just a safety document. A few principles:
Don't cluster food at the entrance. Pull vendors deep into the site so people walk past everything.
Separate the queue lanes from the walking lanes. Vendor lines that spill into the main path create a jam that reads as "too crowded" and makes people leave.
Put seating in the middle, near the bars. Seated people stay longer and buy more.
Spread restrooms. One bank of units in a far corner produces a permanent visible line, which is the single most common thing people complain about afterward.
Keep a clear emergency lane wide enough for a vehicle, marked and enforced.
Then walk the site as though you've never been there. Where do you get confused? Where do you not know which way to go? That's where your signage goes.
Step 4: Permits, food safety, and insurance
Requirements vary by state, county, and city, so treat this as a checklist to take to your local authorities rather than an answer. Start these conversations at least three months out — health departments in particular have submission deadlines.
Typically required in the US
Special event permit from the city or county
Temporary food facility (TFF) permits from the county health department — usually one per vendor, sometimes with an event-organizer permit on top
Temporary liquor license or special event alcohol permit if you're serving
Fire department approval for propane, cooking under tents, and generator placement
Tent permits for structures above a certain size
Street closure permit if applicable
Noise or amplified sound permit
Sales tax registration, depending on your state
Do not assume vendors handle their own permits. Some do, some don't, and the health department will hold you responsible for who's operating on your site. Put permit responsibility in writing in the vendor contract, then verify it yourself before load-in.
Food safety on site
Your name is on the event, so your reputation carries whatever a vendor does wrong. Require from every trader:
Current health department permit for your county
Certified food manager on site
Proof of general liability insurance naming your event as additional insured
Allergen information for their menu
And provide the infrastructure that lets them comply: handwash stations at a ratio your health department specifies (commonly one per several vendors), potable water, greywater collection, and enough waste bins that nothing overflows next to a seating area.
Insurance
At minimum you need general liability, typically $1–2 million per occurrence, with the venue and municipality named as additional insured. If alcohol is served, you need liquor liability separately — general liability does not cover it.
Then consider event cancellation insurance, which can include weather coverage. For an outdoor single-day event with high fixed costs, this is worth pricing out. Ask specifically how the policy defines a triggering weather event — some require actual cancellation, others pay on a rainfall threshold.
Step 5: Recruit vendors who make the event
The temptation is to fill every pitch. Resist it. Fifteen excellent vendors beat thirty average ones, and the second scenario costs more to power.
What to select for
Quality first. Attendees don't distinguish between "the festival" and "the food at the festival." One bad taco is your event's bad taco.
Variety with intent. Map your lineup across cuisine, price point, service speed, and dietary options before you fill it. If you end up with five burger trucks, that's a curation failure, not bad luck. Make sure there's a genuinely good vegetarian option and at least one vendor who can serve a line fast.
Local independents over chains. Local vendors bring their own audience, get local press interested, and give your festival a personality. National brands bring a logo.
Visual appeal. Photos of the setup, not just the food. A row of well-presented stalls is most of your atmosphere and all of your Instagram.
Vendor application checklist
Ask for all of this up front. It takes ten minutes to add to a form and saves a month of chasing.
Business name, contact, and website or social
Menu with prices
Photos of the stall, truck, or tent setup
Physical footprint including hitch and awning
Power requirements in amps and voltage — the single most common late surprise
Propane use and tank quantity
Water needs and greywater volume
County health permit number and expiry
Certificate of insurance, with your event named
Previous events worked
Arrival time and setup duration needed
That power question deserves emphasis. Three weeks before the event is a bad time to discover that six vendors each need 50 amps and your generator plan covered half of that.
The contract
Cover, at minimum: pitch fee and payment terms, exact load-in and load-out windows, required operating hours, what happens if they sell out early, cancellation and refund policy, waste and greywater responsibilities, permit and insurance obligations, exclusivity if you've promised any, and what happens in severe weather.
Then treat them well
Vendors talk to each other, and a good vendor roster is the hardest thing to build and the easiest thing to lose. Get them loaded in on time, keep ice and water coming, tell them honestly what attendance you expect, and pay on schedule. A festival with a reputation for being well-run gets first pick of traders every following year.
Step 6: Program the experience
Every extra hour someone stays is more money spent and more content posted. Programming is what turns "we ate and left" into an afternoon.
Live music, scheduled to fill the slow window right after opening
Chef demos — cheap to run, excellent press hook, and they anchor people in one spot
Tastings and workshops as separate paid tickets: pairings, cocktail classes, cheese or coffee sessions
Competitions — chili cook-offs, hot wing challenges, a people's-choice vendor award that gets traders promoting the event to their own followers
Kids' zone, which is what determines whether families stay two hours or five
VIP area with shaded seating, a dedicated bar, and early entry
The VIP tier deserves a specific note. It's usually the highest-margin thing on your ticket page, and what people actually pay for is a place to sit down and a shorter bar line — both of which cost you very little to provide.
Step 7: Build the event page and set up ticketing
Most ticket decisions get made in about ninety seconds on a phone. Your event page needs to answer what is this, when and where, and how much before anyone scrolls.
What the page must contain
Date, hours, last entry, and whether it's one day or a weekend
Ticket types with prices clearly differentiated
Vendor lineup, or at least headline names
Parking, transit, and a map
Accessibility details — step-free routes, accessible restrooms, seating, quiet areas
FAQ: dogs, kids, coolers, re-entry, cash or card, refund policy
Photos from last year, or from comparable events if it's year one
A visible buy button that follows people down the page
If the same question keeps landing in your DMs, your page hasn't answered it.
Pricing your tickets
Work from the break-even number you calculated in Step 2, then sanity-check against comparable local events. Common structures:
Early bird — a genuinely limited quantity at a real discount, to pull cash forward and prove demand to sponsors
General admission
VIP at roughly 2.5–4× GA
Family or group bundles
Tasting or drinks packages as add-ons rather than separate tiers
One warning drawn from experience across the industry: be careful with cheap entry-only tiers alongside a premium tasting tier. If the gap between them isn't obviously worth the money, a lot of people buy the cheap one and you've discounted your own event. Either make the premium tier clearly better, or price entry high enough that the upgrade is an easy yes.
What your ticketing platform should do
For a festival, the requirements are fairly specific: multiple ticket types, add-ons, discount codes, fast check-in for a crowd arriving in a two-hour window, and real-time sales data.
TixFox handles this at 39¢ per ticket with no monthly fee and no tiers — which on a 2,000-ticket festival is $780 rather than the four-figure percentage cut most platforms take. The pieces that matter most for a food festival:
Add-ons for VIP upgrades, drink packages, tasting glasses, and merch, sold in the same checkout
Discount codes for early bird pricing, partner promotions, and vendor referral codes
Custom fields to collect dietary needs, group size, or how they heard about you
Check-in assistants so gate volunteers can scan without access to your financials
Tap to Pay for walk-up sales on the gate — a phone, no card reader, ticket issued and checked in immediately
UTM tracking so you know whether the radio spot or the Instagram partnership actually sold tickets
Instant Stripe payouts to your own bank account, which matters when you're paying deposits before the gates open
Fee control to pass fees to buyers or absorb them into your price
Payouts landing before the event rather than weeks after is not a small thing when your generator deposit is due in June.
Step 8: Market it over months, not weeks
People plan weekends in advance, especially if travel or a group is involved. Sell in phases so you always have something new to say.
Phase 1 — Launch (4–6 months out). Early bird tickets to your email list first, then public. If it's year one, launch alongside your first three or four confirmed vendors so there's something concrete to sell.
Phase 2 — Reveals (2–4 months out). Release your lineup in batches over several weeks. Every vendor announcement is a post and a reason for that vendor to share you with their followers, which is the cheapest reach you'll get.
Phase 3 — Programming (6–8 weeks out). Chef demos, music schedule, competitions, VIP details.
Phase 4 — Urgency (final 3 weeks). Early bird deadline, "under 200 VIP left," logistics posts, weather-forecast-permitting final push.
Alongside that:
Local press. Give them a story, not a listing. A charity partnership, a chef with a name, a dish that only exists at your festival, or a genuine local-economy angle. Community papers, radio, tourism boards, and regional food bloggers will all cover a well-framed food event.
Partnerships. Your vendors, sponsors, local breweries, hotels, and the chamber of commerce all have audiences. Give them a tracked link and a code, then look at your UTM data afterward to see which partnerships were real.
Social. Short video does the heavy lifting — food being made, the crowd, the atmosphere. Vendor spotlights, behind-the-scenes build content, and countdowns.
Email. For a returning event, your list is your most valuable asset. Previous attendees convert better than any paid channel. Give them early access before the public launch and they'll reward you with the first sales wave, which is exactly what you need to show sponsors.
Step 9: Plan for weather and the four things that always go wrong
Weather
This is the biggest single risk to an outdoor food festival and it deserves a written plan rather than optimism.
Decide in advance, on paper:
Your decision deadline and who makes the call. Name a person and a time — e.g. 6am Friday for a Saturday event. Vendors and staff need to know when they'll hear.
What "cancel" means for money. Refund, credit toward next year, or rain-or-shine no refunds. State it on the ticket page at point of sale. Ambiguity here becomes a chargeback problem later.
Your rain-but-proceed setup. Additional tenting, matting for muddy ground, where people shelter, whether the music moves.
Heat plan. Free water stations, shade structures, and a medical presence that's actually briefed on heat illness. Plan ice generously — roughly 1 to 1.5 lb per attendee for a warm day, more if you're pouring drinks.
Wind thresholds. Tents and banner walls come down at a specific wind speed. Know it, and know who's responsible for striking them.
The four recurring failures
Queues. At the gate, at the bar, at the one vendor everyone saw on Instagram. Staggered entry times, more scanners than you think you need, and a bar layout with multiple service points fix most of it. Queue length is the number one driver of bad reviews.
Power. Undersized generators, too few distribution points, no electrician on site. Collect vendor amperage on the application, total it, add 25%, and have a backup plan for a generator failure.
Restrooms. Common industry guidance is roughly one unit per 75–100 guests for a four-hour event, more if alcohol is served, plus ADA units and handwash stations. Under-provisioning here is what people remember and post about.
Payments. Cell signal collapses when 2,000 phones arrive at once. Test signal on site in advance, tell vendors to bring offline-capable card readers, post clear "card only" or "cash accepted" signage per vendor, and have an ATM if you can.
Step 10: Event day, then the debrief
The morning
Brief everyone — staff, volunteers, security, vendors — with a short written sheet covering their role, site map, emergency procedures, who to escalate to, and the answers to the five questions guests ask most.
Then walk the whole site as a guest would, before the gates open. Check signage from a stranger's point of view, confirm every scanner works and is charged, verify vendors are set and permitted, and look at your entry and bar areas specifically for where lines will form.
After
The week after the event is when you build next year's advantage.
Measure against the goal you wrote down at the start: attendance versus capacity, revenue versus total cost, vendor satisfaction, attendee feedback themes, and which marketing channels actually drove sales — your UTM data will tell you plainly.
Send an attendee survey within 48 hours while it's fresh. Look for repeated comments, not single complaints.
Then save everything: supplier contacts and quotes, the final site plan with power runs marked, real budget versus actual, staffing notes, and a plain list of what you'd do differently. Year two is dramatically easier if year-one you writes it down. If you're running the same event annually, duplicating last year's setup — ticket types, add-ons, custom fields, branding — takes minutes instead of a rebuild.
And thank people properly. Vendors, sponsors, volunteers, and the parks officer who approved the permit. Those relationships are the actual asset you built.
Food festival planning FAQ
How much does it cost to run a food festival? A small community food fair might run $5,000–$15,000. A mid-size single-day festival for a few thousand people typically lands somewhere between $30,000 and $80,000. Multi-day festivals with major entertainment run into six figures. Infrastructure — restrooms, power, fencing, security — usually consumes the largest share, and those costs are mostly fixed regardless of how many people show up.
How far in advance should I start planning? Six to twelve months for a first-year event. Book the venue up to a year ahead for popular dates or parks. Health department permit deadlines are often 30–60 days out, but start those conversations at three months so you have time to fix anything unexpected.
What permits do I need for a food truck festival? Usually a special event permit from the city, temporary food facility permits from the county health department for each vendor, fire department approval for propane and cooking, tent permits above a size threshold, and a temporary liquor license if you're serving alcohol. Requirements vary by jurisdiction — call your local health department first.
How do food festivals make money? Ticket sales, vendor pitch fees, sponsorship, VIP upgrades, add-ons like drink packages and tastings, merchandise, and sometimes parking. The healthiest festivals cover most of their fixed costs from vendor fees and sponsorship before a single general admission ticket is sold, so a rainy weekend doesn't sink the year.
Should I charge for entry or make it free? Free entry maximizes footfall and works well when your revenue comes from vendor fees and sponsorship, particularly for street markets in high-traffic areas. Paid entry gives you predictable revenue, a contactable attendee list, and crowd control — and it makes the event feel like an occasion. Many festivals do both: free entry to a market area, paid tickets for a tasting zone or VIP experience.
What's the best ticketing platform for a food festival? You need multiple ticket types, add-ons for VIP and drink packages, discount codes for early bird, fast mobile check-in for a crowd arriving in a narrow window, and live sales data. TixFox does all of it for 39¢ per ticket with no monthly fee and no feature tiers, with instant Stripe payouts to your own bank account so you're not waiting until after the event to access your own money. Start free →
Planning a food or drink festival? See how TixFox works for food and wine events, festivals, and beer festivals.
Keep more of every ticket sale.
- 39¢ per ticket, $0 on free events
- No monthly fee, no contract
- Get paid as each sale comes in